Showing posts with label purse. Show all posts

Thursday, July 12, 2012

A purse...bag...tote?

Yay!  I've accomplished a project.  However, it wasn't a project on my to-do list.


Ok.  I don't know what this would be considered.  A purse, bag, tote, or is there even a difference between all those?  I've seen this style of bag before, most recently at retail stores, and last night when I decided I wanted to make one of these for the life of me I could not find a pattern or tutorial...because I don't know what it is called.  Is there a specific name to this design?  Most bags I've made or have looked for have a base name like Sling bag, market bag, messenger bag but with this bag I was nameless.

I love the thought of something being reversible, so of course that's what this little bag can do, be turned inside out.  For sturdiness/shape I used fusible fleece, even though I usually don't like to use interfacing when using vintage sheets since I love the soft flowy-ness of the fabric. 


I know I've seen tutorials for this design before, and I love referring to tutorials to get the guess work out making things, but did not find one.  So I decided to draw a pattern up myself.  The bags I usually make are relatively big, so I opted for a small bag, and started off with a 13x13 measurement.  Easy so far.  Then the decision of the handle.  How big should it be?  Drawing one out would be sooo unsymmetrical, so I opted to go MS Word and use their shapes. Hmmm.... however,  I still had the decision of how big the handle should be.  I knew for sure I wanted it to be an oval shape.  I first printed out an oval 1.5" x 4", and that looked too small. So I upped it just a bit and went with 1.75" x 4.5". 


But now with a finished product I think the handle is a little too wide, vertically.  I definitely love the oval shape of the handle, but it's a little tricky to sew around, and even with a ton of clipping around the handles that didn't prevent puckering/gathering/pinching around the handle.  I may opt to do a rounded rectangle shape in hopes that issue is eliminated.

I'm gonna still scour the web looking for tutorials on this. I'm in hopes to find a solution to the top of the bag.  When I made this one and got the sides sewn together and fitted into one another I was left with the unsewn top to tend to.  I'm use to the top being sewn when the bag is inside out, and all that is needed for the top is a top stitch, but in this case I wasn't sure how to handle that with the way the handles are constructed.  So I had to fold in the top edges, iron then sew.  Which, was probably the longest process in this whole bag.  Next time I'll fold down and iron the top prior to constructing the bag for a more straight edge.  Do you know what I mean or did I lose you?

I'm linking up with Faith Hope and Charity Shopping Ta-dah Tuesday.

Read more »

Tuesday, April 17, 2012

The Lulu Pouch

My other projects (WIP/UFO's) seem to be moving at a snails pace.  I've had flags/pendants for more bunting for almost a week now, but for what ever reason I haven't got around to the binding to string/sew the pendants together.  Ugh!

I've also started some fabric nesting bowls, and for streamline reasons I've made about 6 small bowls, but now need the other 5 larger sizes.  Small, same sized bowls can't nest.  Double Ugh!

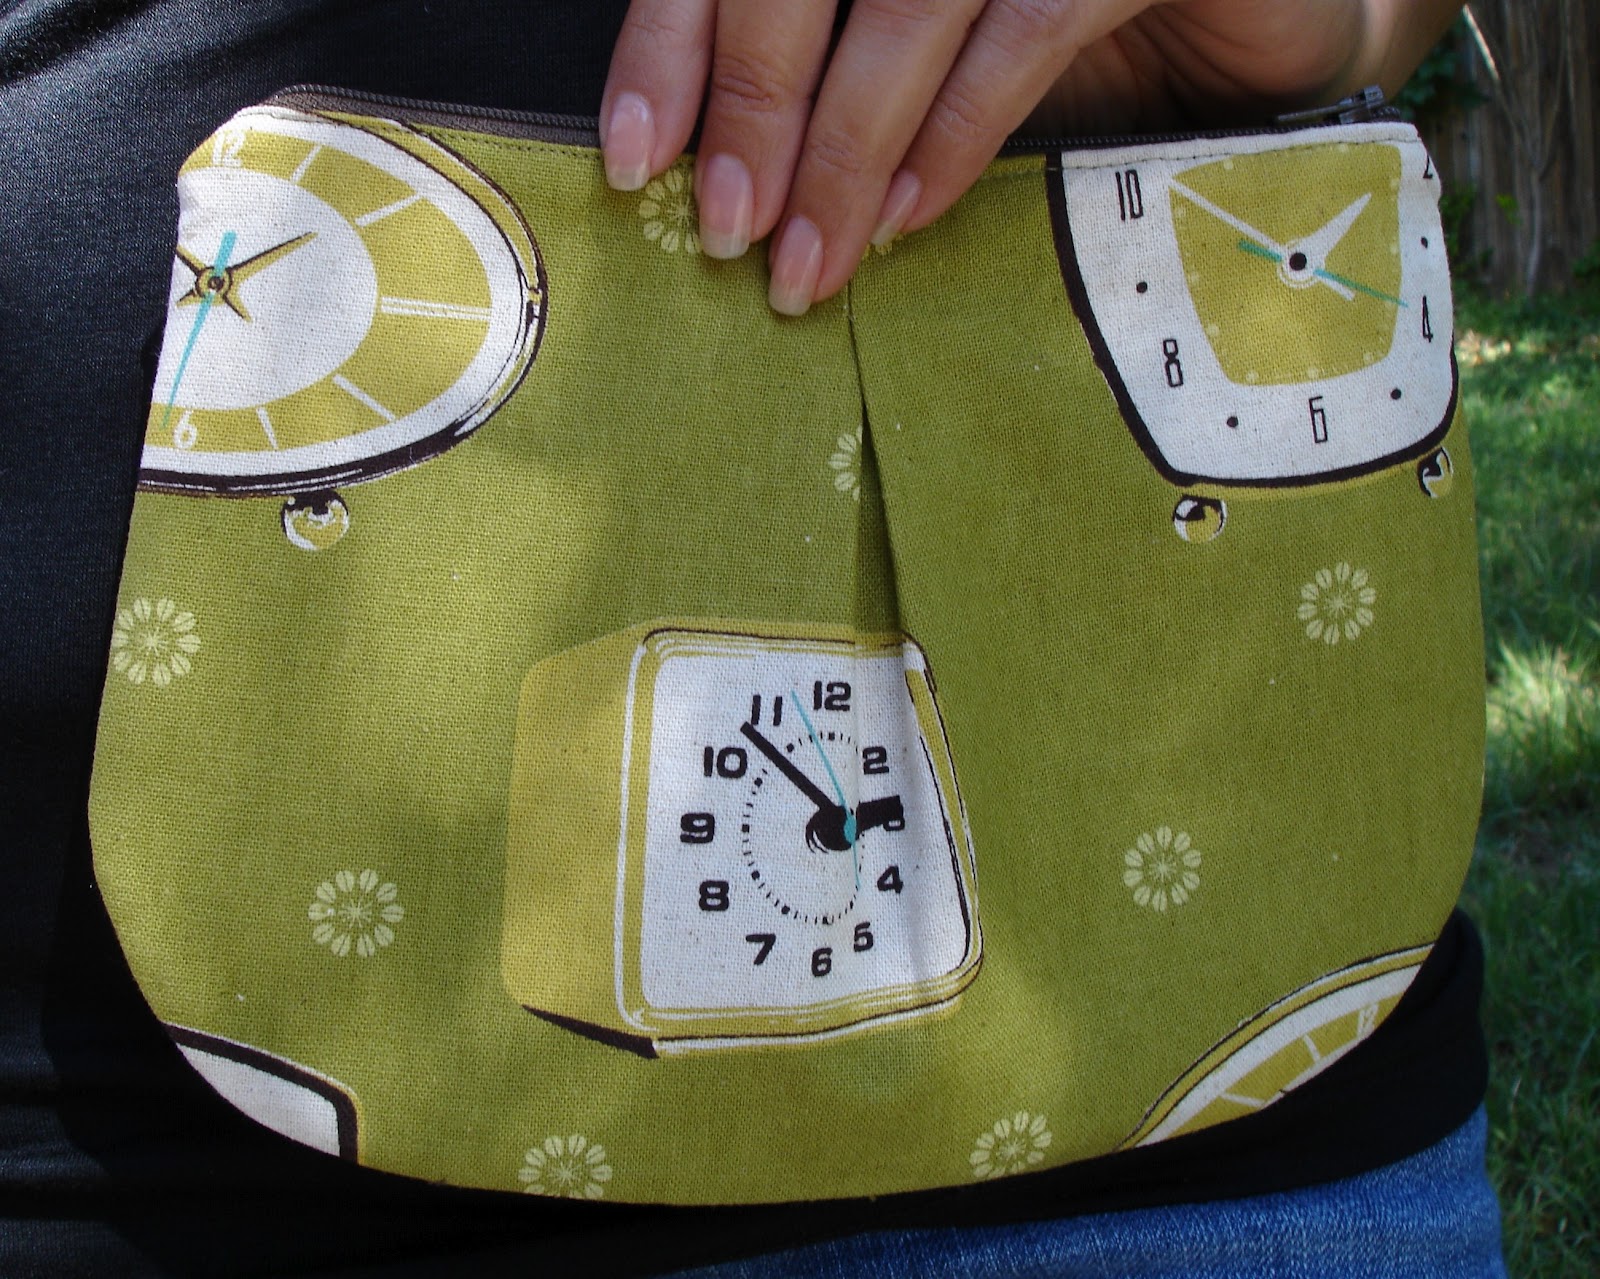
So since I feel like I'm going nowhere, fast, I decided to work on a pattern I purchase last week from Ali Foster.  It's called the Lulu Pouch

As I go to grab some vintage sheets I decide I need a brake from them and go for actual (new) fabric.  I decide on some Melody Miller Retro clocks fabric I won about two months ago, at a local fabric shop, The Stitch Lab. 

I've been wanting to cut into this fabric, but haven't know what to do with it...yet. The Lulu Pouch pattern is sooo super cute and very easy, and looks great with my fabric choice.  I love the over sized coin purse feel it has.  It'll be a great little pouch/purse for some cash, keys and phone. 

This was so quick and easy to make I think I'll make a whole bunch more just for that sense of accomplishment since my other projects are going soooo slow. 

Whatcha think?
Read more »

Saturday, April 9, 2011

Clutch and Crate

Whoo hoo!  I actually feel like I've done something, out of almost two weeks of feeling like I've done nothing.  Check out this soo cute "Grab and Go Clutch" by ithinksew.  I bought this pattern back in February and attempted it once, and completely bombed it.  As always it was a user error.  I did soo many wrong things, like using heavy interfacing on a heavy fabric, and using an invisible magnet (uh duh invisible magnets don't work too well through heavy fabric...note to self).  Plus there was some weird partially sew the inner and out together trick that I've never used before so I was completely confused on what to do the first time I tried it, but I'm so happy now, because second time is a charm and it came out great. 

Is it possible to become more obsessed over vintage sheets?  The reason why I ask is because with each project I do, where I use vintage sheets, it has seemed like a sheet in my stash always coordinates with another.  That was/is my biggest issue with fabric you buy from a store.  I buy what I like and when I come home, depending on the project,  you'll want two fabrics (like for a purse you'll want a coordinating or contrasting for the inside and out), and it seemed like whatever I had in my stash didn't go together (at least in my mind) then off to the store again to buy something that will work with the project in mind.  But with these vintage sheets their like "peas and carrots" (Forrest Gump referrence) they just go together.

Oh!  And I'm soo happy because I was able to finish this so quickly in one night (since I usually drag my projects out).  Yay!!!  I want to make more!!!

So after I made this cute little clutch I had a peanut butter cup revelation.  You know, how two things came together by accident and it was a great accident, because they went so good together.  Well that's what happened when I was moving this cute wooden crate for 10th time this week.  This crate was found last week while garage sale-ing.  I originally thought I might put my rolled up fabric in it, but figured that would be a bad idea since the wood would more likely snag it.  So all weeks it's been moved from the couch, to my bed, to the chair, to the floor, since I don't have a home for it yet.  But while moving it last night I noticed that some small jars I also started buying while thrifting looked to fit in the little squares in the crate.  OMG!!!  That's it!!!   I'll fill this crate up with jars for my crafting odds and ends that I NEED to have out.  Yay!  Another happy dance.

Silly little things like these make me happy.  Looks like it's gonna be a great weekend.  


Read more »

Wednesday, March 23, 2011

The New Life of a Vintage Sheet, and Good-Bye Zipper Issues...Maybe

So I think I figured out my small zipper issue... maybe.

I decided to make some coin purses a bit larger than the ones I had previously made and used larger zippers.  This seemed to work, but I think they worked only because I realized I was sewing the coin purse wrong at the point where the zipper was.  I was folding the zipper in the wrong direction, therefore making the coin purse kinda pucker since the zipper was sewn in place.... in the wrong direction.  Does that make sense?


That was one of those times where you have to stop what you are doing....move away... and do something else.  Otherwise you get caught up in your mistake and momentarily become insane by continuing to repeat your same mistake over and over again hoping to have it magically work out.  I tell my daughter all the time when she gets frustrated when working on a craft or even homework "Step away, take a deep breath and do something else for a bit"...now I just have to remember to take my own advise.  Let's see how the small zippers work out next time I attempt the smaller coin purses.


On a non-zipper note I've made some purses out of the vintage sheets that I have been obsessively acquiring, and OMG they are sooo freaken cute (If I do say so myself).  I love the purse pattern as well.  It's a pattern from Made by Rae called the Buttercup Bag.

Back in December I had made a purse out of this pattern, just before I started blogging, which ended up in my sisters hands, and I loved it.  It was black with a cute oriental parasol fabric for the lining.  In my near future I see myself making another one for myself; since I seem to be a solid colored purse type of gal for my everyday use.

Purse exterior.

So back to these vintage sheet buttercup purses.  This pattern just seems to fit perfectly with these floral patterns.  I've been ready for spring...and some rain... hello rain are you out there?  Looks like we are gonna have a sad wild flower season from the lack of rain, but at least I can get my flower fix while whipping out these so spring-y purses out of these once loved and reclaimed to love vintage sheets.

Here the purses are flipped inside out so you can see the great interior fabric.  Inside has pockets.  The large purse has one pocket split in two.  Perfect size for your phone.
The small purse, I think, is a great size.  The exterior pattern is designed to be cut out of one fat quarter, which I love especially when working with new patterns.  It hurts my heart to use up a large amount of fabric on something that might not work out as expected.  Plus the small purse is a great size for an evening out; for your keys, wallet and other small necessities.  The large pattern will work best for my daily use since I like carrying around soo many non-essential items.

On another blog Artsy-Crafty Babe she has talked about how she's used Mulsin in leu of interfacing to keep the softness of  the vintage sheets, but to still give the purse some stability/thickness, and she is sooo right.  I would have hated to use interfacing to stiffen up the flowy goodness of these vintage sheets.  Not only do they look good, but they feel good too... nice and squishy.

Both purses will be posted in my Esty shop this week.  Leave a comment if your interested and I'll set up a special reserved listing for you.  I'm thinking $12 for the small one and $21 for the larger one, plus S/H (well $18 for this particular one since there is a small imperfection in the stitch at the top of the purse where I bumped into the button...oops.  So the stitch is straight then curves over the button....then straight again.  Note to self.... place button 1/4 inch lower next time.)
Read more »

Saturday, January 22, 2011

Foldy coin purse

So there was this coin purse I saw online the other day, mentioned in a blog on Sew, Mama, Sew! It was  made  from a Japanese craft kit.  The second I saw this coin purse I yelled in my head "This is what I've been looking for!!".  Seriously I have spent a lot of time looking for a foldy little coin purse like this, but have not found anything even close to it.  I was about to ask the blogger to mail me a kit (I'd pay her of course), but I didn't want to wait.  Of course I started looking online, again, to see if I could find a pattern similar, but got quickly frustrated.  

What to do now?  I'm make it!  I'll wing it.  So I start folding paper into little boxes.  The top overlaps the the bottom.  The two sides need to match the front.  The first paper box was much too big (unless I was making a coin purse for Plinko chips).  The second paper purse...eh still a bit too big.  The third one just right, and still big enough to even hold my credit card... perfect!

OK it's perfect but I need to add a seam allowance; a 1/4" should do.  So I proceed in drawing the pattern 1/4" bigger.  Time to cut out two pieces of fabric.  In the blog she did mention a thicker fabric; so I used heavy interfacing for one side (both sides might be a good idea next time).  I sew right sides together with a opening left so that I can turn right side out, press with an iron and sew the opening close. 
Hmmm? Now I have a two sided plus sign.  What am I to do next?  Ok lets just line up the edges together to form the box like I did with the paper and do a really close seam on all edges.  Yea!  It's a box!!

I, as of yet, don't have the little button fastener plier tool thingy. So I'm gonna have to go with another type of button with a loop to hold my purse closed.

Wow!!  This was much easier then I expected.  I'm soo happy that I saw Karen's blog on Sew, Mama, Sew!  Thank you!

Read more »

Saturday, January 8, 2011

Pleated Tote

Yes!  I didn't let my allergies hold me down today.  I'll admit it was tough, but I made it through the day, and I managed to make a tote (an allergy medicine induced nap was snuck in, but it was much needed).  The tote is super cute; a free pleated tote pattern courtesy of Artsy Crafty Babe, thank you. 

 
There was some minimal issues I came across, on my end.  The pattern and instructions were simple and easy to follow.  Go figure I finally remember to crisply line up my side seams (the interior from the exterior), but then end up not pleating my pleats enough.  Then there were tension issues.  I'm scared of touching the tension dial.  I feel if I leave it alone all will be ok... but that's not always the case since fabric thickness always varies... or what ever other reasons there are that affect the tension.

Just when I thought I was on the last step of the process, finishing off with a top stitch, the bottom thread got all bunched up in several spots.  Of course this was not noticed until I sewed the whole top. Ugh!! So now I have to proceed with the tedious task of getting the seam rippers out and carefully cut out the top stitch.  Let's try this again...top stitch and ... the bottom tread bunches up again.  Ahhhh!!!  This happens right at the side seams and handles (the thicker parts)... and this happens to me quite often.  UGH!  Again the long process of ripping out the thread.  Deep breath..... lets try this again.  Wait!  Let's pull out my sewing guide, that I received from The Stitch Lab, and look at thread tensions.  My tension could be tweaked a bit...maybe...who knows.... but it's worth a try.  It looks like the bottom thread is loose so I tighten it from a 4 to 5.5, and I also increase my stitch length, since this is more of a decorative stitch then a stability stitch.  Third times a charm right?  Sewing....and sewing....slowly sewing...Yea!  it worked! Yes!!  Now who knows what fixed the issue the tension or the length, but who cares the thread did not bunch up again.  Happy dance!

Now the not close enough pleats are gonna drive me mad, but... I guess that means I'll have to make another one.  Sigh!  If... I... have... too.  Haha maybe I'll be brave and use a fun fabric on the outside next time...or another practical color.  Let's see.      
Read more »