Sunday, February 27, 2011

Tooth Fairy Castle Pillow with Drawbridge Tooth Pocket

Original unfinished pillow.
At Sew, Mama, Sew!  it was February pillow month , and I had great expectations to create a pillow or two and enter their contest, but that did not happened.  However, I did create a bolster pillow made out my daughter's outgrown pajama pants.

Anyways,  daily I've checked out Sew, Mama, Sew! to see the pillow creations and tutorials.  One day they  had a Tooth Fairy pillow up for display.  This reminded me of an incomplete Tooth Fairy pillow I made for my daughter years ago.  She, maybe, only used it once or twice, but she kept it on her shelf with all her other favorite little things she loves.

So as soon as I saw the tooth fairy pillow on Sew, Mama, Sew! I grabbed my daughter's castle off her self so that I could create a tutorial for the one that I made (about 5 years ago).  The first picture of the pillow is the incomplete one.  Aside from polyfill inside the castle I never added the back side of the pillow, so this is probably why it's more shelf art (like my daughter has used it) instead of a pillow.  Plus I never added the elastic to hold the drawbridge closed (shame on me...I know), but you know how the saying goes... "Better late then never".  Eh.... well  in this scenario this saying doesn't work, since my daughter no longer has any baby teeth left.  Sigh...  sniff... 

Well with no further delay here for you is a PDF pattern along with some pictures on how I put together this Tooth Fairy Castle Pillow with Drawbridge Tooth Pocket.  Finished pillow is based on the PDF pattern, slightly different then the original unfinished pillow.
Cut out felt pieces from pdf pattern.
I started off by sewing the tower to the bottom portion of the castle.
Next I started to sew the side triangles to the drawbridge.  Small flat side of triangle will be in center of drawbridge.
Both side triangles are now sewn onto the inside, front of drawbridge.

Next sew other side of triangle to drawbridge, at the same time sewing it to the bottom portion of castle.  Sew around top of drawbridge then back down sewing triangle on other side of drawbridge.
Sew door, and tower crown onto tower.  Sew along one side, and top of tower.  Add optional polyfill.

Pin remaining sides down to hold in stuffing, and sew remaining sides of castle.  Lay back piece of felt on top of castle.  Sew the pillow leaving small opening to turn pillow right-side out.  Stuff with polyfill and sew opening closed.


Add button and string or elastic to hold draw bridge closed.  I also cheated and glued the windows on.

Voila!  You now have a Tooth Fairy Castle pillow with a drawbridge tooth pocket.
Read more »

Tuesday, February 22, 2011

It's amazing where a little blog can travel to.

Wow!  It's amazing where a little blog can travel to.

See?  I'm listed on their blog.  Wow!
The last couple of days I've noticed that I was getting quiet a bit of traffic on my blog from France.  Hmmm?  It's been crazy to see that I would get an occasional view here and there from different counties to begin with, but to see about 30 views from France in the last few days was really weird (well to me since I'm new to this blog world).

So the other day I attempted to look at the website where the traffic was being directed from, but I wasn't able to locate any information about my blog.  Hmmm.  So as I see views, again today, directed from this site I go back to see if I can find anything about my site.

GASP!!!  They have my Pajama Pants Drawstring Bolster Pillow tutorial linked from their site!  It's titled "Pyjama > coussins".  Pajama cushions.  How great is that?!

The wonderfully creative blog, one of my favorites, Obssessively Stitching is also on this list of links.

Wow!  This is so freaken amazing!


Thank you to all who visit my little blog.  This is incredibly inspiring.  All the blogs I read are so inspiring to begin with, and now to see that people near and far are actually viewing my blog is giving me even more "want" to make and create things.

Happy dance.

Thank you again!!    
Read more »

Sunday, February 20, 2011

Question about Vintage Fabric.

So as I mentioned in an earlier post, last week, I've been working on this purse (It's taken me this long because I always tend to have issues with the bottom thread tangling up when sewing at the handles and just along the rim of the purse).  The pattern is from Artsy-Crafty Babe, and the exterior fabric is from a garage sale. 

I love this pattern, I love the exterior fabric as well, but I'm not too fond of my interior fabric choice.  At first I thought it would look good, but now... not so much. I need to figure out what would be a good coordinate with this fabric.  Any suggestions?

Waverly fabric.  Is this vintage?
I have a question.  How do you know when a fabric is vintage?  This is a Waverly fabric, "Field of Flowers".  I've Googled this information, but didn't find anything resembling it.  I've guessed it's vintage because a lot of the fabrics at the garage sale had a very "dated" look....meaning they looked old (almost retirement home old or like Village Inn old (if any of you have ever been to a Village Inn restaurant you'll know what I mean)). 

The fabric was being sold by the bag.  You got to stuff a grocery bag until it over flowed for $5. Score!  Three yards of this Waverly fabric was stuffed in and a whole bunch of smaller random fabrics were chosen by me, my daughter, and mom.  This was early November, just before my sewing obsession kicked in.  Now I regret not getting more. 

Fabric with 1979 side line.
You can see the information I got from the Waverly fabric is on the side line, edge of the fabric.  Does anyone know what these side lines mean?  There is another fabric I have that has a date of 1979.  Does this mean it was printed in 1979 or is it a reprint from 1979?  This fabric I used in an earlier project, the pleated tote.


It would be nice to know this information in the event I want to sell an item made from these fabrics.  This way I could indicate the fabric is vintage.   

Thanks for stopping by!

Garage sales finds.  

More garage sale finds.

My favorite garage sales finds. 
Read more »

Friday, February 18, 2011

Giveaway Winner

It's time to announce the winner of my very first giveaway of this super cute Moda fabric! 


Drum roll please!


Congratulations to Liz!  I will be emailing you for your mailing address.  

Thank you all, followers, non-followers, and passerby's  for stopping by and taking a look at my little spot in blogland.  All the blogs I have been following are oh so inspiring, and  they keep me wanting to sew more and more.  There's not enough hours in the day to do all the things I want to do.  So I hope in some small way my small accomplishments inspire you to do, make, create the things that make you happy.

Now, along with sewing, I want to start Thrifting.  There is this blog, Apron Thrift Girl, that I've been following.  She talks about her daily, weekly ventures in thrifting and selling on Ebay and Etsy.  I love all the information she provides; the insight on what she does, and how she does it.  On occasion I've been know to sell a random item on Ebay (nothing fun and exciting.  Most recently school books.), however, I do have a goal to open up an Etsy shop and sell the things I create, and/or maybe the things I find.  First and foremost I want to feel comfortable and confident in my creations.  Who knows maybe I'll have some future giveaways on a guinea pig level.  Meaning giveaway items I make to see how they hold up out in the real world.  Keep an eye open for that.

Thanks again for stopping by.
Read more »

Thursday, February 17, 2011

Pajama Pants Drawstring Bolster Pillow

As seen on CraftGossip.com


So as I have other sewing projects lying around in my room I, of course, decide to start a third.

Salvaged, from garage sale death, pajama pants.
About a week ago my daughter comes to me wearing her, too snug, pajamas asking if she can put them in the garage sale bag.  Sigh.  They are such cute pajamas. I didn't want to get rid of them and see them sell for $1 in our next garage sale.  So I tell her maybe we will make something with the material.  A huge smile forms on her face, and she leaves them by my fabric stash.

I already had in mind what I wanted to do with them....make a pillow, but incorporate the existing shape, somewhat, and make a bolster.  This was a no brainer. Well... until I get to the point on how to figure out the circumference of the pillow to cut out pieces of fabric for the ends.  Hmmm?   How about I hem the ends and use a drawstring, just like the goodie bags I previously made?  Sounds like a plan, and low and behold it worked.

This was a very easy project to work on.  The most time consuming part was taking photos of my progress.  Yes. I know.  Once again taking photos in the bad lighting of my bed room, but ugh this is when I do my sewing, at night.  I work during the day, so taking step by step photos during the day is not much of an option. Sorry.
Measured and cut pant leg


Pinned right sides together.

Sewed long side of pant leg

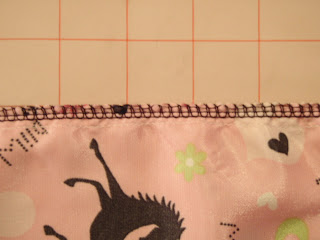
To prevent the slippery fabric from fraying I ran the long side through my serger.

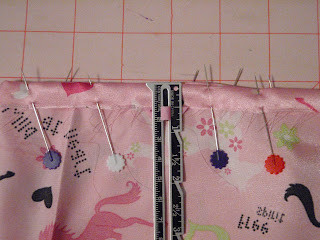
I hemmed the ends of the bolster.  First measuring 1/2 inch then rolled it down and measured 3/4 inched.  Pressed and sewed.

I prefer to use paper clips in lieu of safety pins.  Safety pins, for me, always pop open while running through  the hem.  Stuff with polyfill and pull drawstring.

Tah Dah!  Finished bolster with pretty bow.

Bolster modeling on chair.

More bolster modeling. 
From now on I'm gonna rethink giving clothes up for garage sales.  There is so much more rewarding things I can do with the fabric.  Let's see what I can dig out of my closet next.
Read more »

Wednesday, February 16, 2011

1/2 yard of Moda "It's a Hoot" Fabric Giveaway Reminder.

Hello to all the passerby's of my little blog.

**This giveaway has ended**
Just a reminder I have a 1/2 yard of some yummy Moda fabric I'm giving away.  All you need to do to enter is leave a comment on the original post, here.


Please don't be shy.  It would be nice to hear from you all, near and far.  What projects are you currently working on?  I'm currently in the middle of a purse, and the beginning of a quilt.  The purse pattern is a free pattern I acquired from Artsy-Crafty Babe.  For the exterior I'm using...I'm guessing a vintage Waverly fabric.  I'm guessing it's vintage only because I bought it at a garage sale, and a lot of the fabrics there were really dated (as in retirement home decor type fabric) but there were some really pretty ones.  There was one I used for the lining of my pleated tote.  The side line info on the fabric indicated 1979...so I don't know if it was made at that time or if it was just a reproduction of the fabric from that year.  
Lining is from a garage sale.  Side line on the fabric was dated 1979.
Oh! I'll later post the name of the Waverly fabric I have, maybe one of you out there can verify if it's vintage or not.  I've Googled it but couldn't find any information.  Either way I love it.  

Remember, I got the Moda fabric I'm giving away.  Go enter, here.  
Read more »

Tuesday, February 15, 2011

Very little being accomplished. How about you?

Wow!  I feel like I haven't accomplished much the last couple of days... probably because I haven't (I must have been sleeping).

I did, however, add the final stitches (literally) to a skirt I made my daughter.  This is one of those projects that is almost done, and for what ever reason haven't gotten around to finishing it.  The whole skirt was done, but the skirt hung on the back of my chair for a week before I spent like 30 seconds to sew the ends of the elastic waistband together .

My poor daughter, 11, she would keep on asking me "is it done yet?"....  a day or two later "now is it done?".   So finally Saturday night I decided it needed to get it off my chair and finished it, and my daughter wore it the next day.  Yay!  (It is a little more countryish then what I would have wanted.  The combination of fabrics, I guess gave it this look; even though separately they are not countryish what-so-ever.  Oh well... it is what it is.)

She loves it, but for me it's not the accomplishment I wanted it to be.  This was my first skirt project so the amount of fabric really intimidated me...it looked to be a lot.  Even as I was cutting it my daughter would say, in an offended manner, "I'm not that big", since it seemed really wide.  I know the elastic was gonna cinch it tighter, and I know the rows should of been longer so that more gathering and ruffling could occur, but like I said the amount, or I guess the length of  the rows of fabric scared me.

Also as I was cutting the fabric I thought to myself "Oh this is a lot of fabric to waste.  What if the skirt doesn't come out?  Then I chopped up all this fabric for nothing." So of course these thoughts somewhat kept it from turning out the way it should have.  But like I said this was my first skirt.  So this was a learning experience. Now I know what needs to be done, and what shouldn't be done.

My daughter already want's another skirt, which we already bought fabric for.  So lets see how long it takes me to get around to making the next one(s).

Oh!  And I think I'm ready to start working on the quilt with the I-Spy squares I won.  I'll keep you posted on the progress.  There willl be little updates as I slowly match up squares with it's surrounding block fabric.        

Double Oh!!  I did try my hand, last weekend, at making some oreo truffles; I saw posted on another blog.  They took me a little longer then expected, and were nowhere near as pretty as the pictures, but really how often is your first try at something really as nice looking as the pictures you see(shush to those who are perfect in the kitchen)?  But they were oh so yummy.  So yummy I got a stomach ache from eating too much, but I have more to eat and I will eat them.  With some help from my kids.  YUM!!   (They took me long because I have a fear of melting chocolate.  I tried twice last year and did not succeed.  This time I used the microwave and got Ghirardelli chips instead of Nestle and I had no problem at all. Yay!  I melted the chocolate in small batches, therefore, took me longer then if I melted it all at once.)
Read more »

Sunday, February 13, 2011

Moda Fabric Giveaway!

**This giveaway has ended**

You know what?  Since I love giveaways so much I want to give something away.

It was such a nice feeling receiving something I simply commented on; so  I've decided that I want to pass along that great feeling to you.  In the spirit of giving, and the want of Spring to be here, now, and I guess since tomorrow is Valentines Day;  I want to spread the love, and give to you something Springy (To me this fabric is very fresh Spring like).

So here it is.  Up for grabs is half a yard (42"x18") of Moda "It's a Hoot", fabric.  This is from my own personal stash.  It was purchased back in December, because it was oh so pretty, but as of yet have not decided what to do with it.  I still love it, yes, but maybe one of you crafty women, or men, out there can put it to good use.


Let's see.  I'll give you a few different chances to win this lovely fabric.  Just as simply as I won, the I-Spy squares from Obsessively Stitching, all you need to do is leave a comment.

For extra entries leave separate comments for each of these.
1.) Let me know what you would possibly make with this lovely fabric.
2.) Say "Hi" if you are currently a follower and/or let me know if you are a new follower.
3.) Let me know what your favorite crafty blog is to read.  (Almost daily I'm running into new blogs and it's been so addicting to find new fantabulous ones.)

That's 1, 2, 3, 4 chances to win.  So are you in?

Oh and yes for this giveaway I'll open it up Internationally.  Please make sure you leave your email address in your comment (if you don't have a profile already set up that's linked to your name/comment).  

A random winner will be selected on Friday, February 18, via Random.org (Comments will be taken up until 1:59 CST Feb 18).  I will email the winner to get their ship to address once they are selected.  If for some strange reason I don't receive a mailing address within 5 days of the winning email being sent out, another winner will be selected. 

Yay!  Let's do this.
Read more »

Saturday, February 12, 2011

Look what I won!!

Yay!  I won some I-Spy squares from Obsessively Stitching last week and I just got them in the mail yesterday.  I'm even more excited now that I received them.

Even though I've sown on and off for years I've never done it as concentrated as I have now, within the last two-three months.  I've learned so much and there are countless things out there that I still haven't tried.  One of them is quilting a blanket.   

As soon as I received the package I started Googling projects that could be done, aside from a blanket.  However, this morning as I was going though the stack of squares, again, I asked my daughter, 11, what I should make with them.  She asked me to make her a blanket.  Ok!  A blanket it is.

I'm actually really excited about this project.  I'm gonna take my time and take this project slooow.   There is a bit of research to do since I've never made a quilt/blanket before.  Obsessively Stitching does have "First Ever Quilt" links that I'm definitely going to reference.  I've already determined the pattern I want to use, I think.  My daughter has picked out 50 I-Spy squares.  So I'm thinking to boarder each square with a coordinating or contrasting fabric, which ever looks best.

Hmmm.  As I'm typing this I'm guessing there is gonna be quiet a bit of math involved.  Isn't there?  I'm gonna need to calculate how big I want the blanket, minus the squares I do have, and figure out the amount of other fabric to incorporated into it, right?

Ooooh!  This is gonna be fun.

Thank you Obsessively Stitching.

Oh yeah!  She has some really cool patterns for creating Angry Bird plushies. I've got them printed and on my to do list.  Awesome!!
Read more »

Thursday, February 10, 2011

It's Officially Over. I'm done.

It's over this time.  Done.  Really.  Prudent Baby's Sewing Machine Double Down Contest has officially closed for entries as of last night, and all I can do is wait.

A last minute entry was created.  I had seven hours to spare (5-12), after work the last day of the contest, and I used up about 6 of them sewing, taking pictures and sending off the email.  Whew!

During the time of the contest Prudent Baby posted some potholders for inspiration, as well as some of the early entries.  There were two post that were of aprons with potholders incorporated into the apron.  Initially I thought these were very clever (they are), and they were oh so nice.  However, once I started to think about them it seemed (I could be wrong) that if my potholder was attached to my apron then wouldn't that mean that I would be pulling my waist towards the oven?


Hmmm.... that can put you in a precarious situation.  I don't want to be thrusting my middle into the oven as my apron is being pulled, not only towards, but into the oven.  How would that be explained to my kids?  'Kids, your mommy threw herself into the oven.'  No thanks!  I'll save that for another day.


So in the heat of the moment you want something that is easily removable right?  Ah hemm.... we are talking about potholders here.  Therefore, my potholders, aka pockets, are removable via velcro.  Yay!  

I cut the velcro into pretty little hearts in order for it not to be an eyesore   

Luckily the kids were with their dad (this night); otherwise I would not have been able to spend 6 hours, after work, on this project.  I made two potholders, and one apron (Thank you for the fat quarter apron tutorial, Prudent Baby) in one night.  Oh lord!  I need to sleep.


Sadly I had to abandon my goal for better pictures, this time, since I couldn't wait to take pictures in natural light, because of the deadline.  So I hope that doesn't hurt me too much as an entry.  Oh well!  I gave it my best...well based on the time frame I gave myself for this particular entry.    


So, on to the next contest.  Sew, Mama, Sew! is having a pillow contest.  Hmmm, lets see what I can whip up.  

Oh!  All in all, yes it would be nice to win in these contests, but over all the inspiration and the push to create is great.  I've learned so much already.  Learning is a great confidence builder when it comes to sewing...well I guess when it comes to anything.    
Read more »

Monday, February 7, 2011

Potholder Entries

Well it's done... almost.  I've submitted my entries and all I can do is wait.  I created four potholders for Prudent Baby's sewing machine double down.  There's about 48 hours left so I may make some more. 

The four are all unique in their own way...well based on what I've personally seen during my potholder research.  Yes, they all have something in common, they are potholders...duh, but I've tried to create something that was different.  They all started off with a thought in mind and were adjusted as ideas popped into my head.

Backside of chalkboard potholder
For example the chalkboard potholder started off as a regular square potholder in mind, since this was my first ever potholder to sew.  However, as I looked at tutorials, and designs it seemed that most potholders have loops or holes to hang on knobs or hooks.   Hmmm, well I don't have hooks or knobs in my kitchen so I don't need one of those loops on my potholder, but it would be nice to have it easily accessible.  "Ooooh how about a magnet so that I can keep it on the oven or on the refrigerator? 'Gasp!' The refrigerator! I can use the chalkboard fabric to write notes on the refrigerator!!!"  Then the chalkboard, potholder with a magnetic tab was born. (In case you are wondering I purchased the chalk board fabric from Nancy's Notions.  I've only purchased from there once, only because I like to have my fabric now and buy from the few stores around my house.  Other online shops I have bought from are Fabric.com, and Fort Worth Fabric Studio(both also once).  However, all three were quick in their shipments and I'll more likely buy from them again.) 

Backside of pinwheel potholder
The next three evolved less then the first one did, but there was brainstorming involved.  The pinwheel was inspired by a pinwheel project I ran into.  It initially seemed easier then what it turned out to be.  The project was a no sew, but with the potholder I had to sew it.  I started out sewing the fabric right sides together but then realized I wouldn't be able to turn it right side out since the center of the pinwheel was so narrow.  Ugh!!!  I grab my seam rippers to undo the stitches.

I did end up sewing the pinwheel right side together again, however I left the bottom half of the pinwheel open (on all sides), and this is where I turned it right side out, but then that left weird openings and it was not very practical, or pretty, to hand sew it closed.  That's when I decided to sew it applique like onto the potholder, but after I quilted the both sides of potholder separately. Then applied the pinwheel to one side, then joined them together with the bias tape.  Whew!

The next two were inspired by the fabric I had in my stash.  Both green fabrics were very fresh looking and reminded me of spring, which I can't wait for.  That's when I decided to maybe do a flower, 6 petals.  It's looks more like a pizza then a flower but I like the way it came out.  The dark orange single fold bias tape I used on the pouch was from my great-grandmothers stash...so I'm guessing it's vintage since the rick rack, hem tape and other bias tape in this stash has prices of 19, 25 & 35 cents.  It's crazy using this stash, just a few months ago I didn't know what to do with this weird ribbon, haha.  Even though my great-grandmother is no longer here, she is here in spirit sewing with me.  :-D
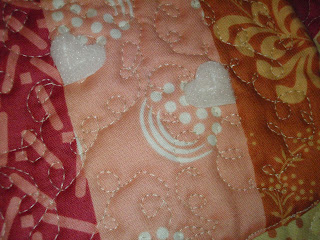
Look closely for the free motion quilting.


Last but not least the owl potholder is self explanatory.   I saw owls and figured an owl potholder made sense.  Drawing is not my best attribute, but looking at the owls they are all symmetrical so I would only have to draw half an owl; fold a piece of paper in half and voila I got a whole owl.  With the owls I didn't want to quilt straight lines that would take away or mess up the owls themselves.  It was then that I realized I needed to try free motion quilting, and since I just saw the tutorial posted on Prudent Baby I figured I'd give it a try.

Momentarily I practiced free motion quilting on a scrap potholder (I have a small potholder graveyard from ideas that didn't get completed)  then went straight to the owl.  My free motion quilting, obviously, is a little rough, but it didn't take away from the owls which were my intentions.  Oh!!  Like my chalkboard entry this potholder also has a magnet in lieu of a loop, but it's inside the owl instead of inside a tab of fabric.  This is gonna look soooo good on the fridge!

For the moment I think I'm done, but like I said there are 48 hours left until the contest is closed, so I may make another one or two.  I'm drooling for a machine that knows it's alphabets so of course I would like to win.  I'm keeping my fingers crossed, but I'm not holding my breath.
Read more »